When an engine failure occurs in a single engine airplane, a landing will follow. The object under these circumstances is not to see how far you can go before contacting something, nor is it to stay in the air as long as possible before contacting something. The object under these circumstances is to guarantee that you get to the landing spot you picked, ready to land.
This object is accomplished by flying your final approach in such a manner that you can extend your glide or shorten your glide as necessary to land exactly at the point you chose to make your forced landing. I call this the APPROACH mode and will describe it later.
In other words, after you decide you will have to make a forced landing without power, you will fly at your best angle of glide speed and configuration until you reach a point where you think that flying the APPROACH mode, to be described later, will bring you to your chosen touchdown point at proper speed and configuration for an essentially ‘normal’ landing.
This is quite different from, “Fly your best angle of glide speed, go to your chosen forced landing spot, and land.”
Each aircraft has a ‘best angle of glide’ which determines the maximum forward distance the aircraft can go for each thousand feet of altitude loss when without power. Each also has a ‘steepest angle of descent’ which determines the least forward distance covered for each thousand feet of altitude loss without gaining airspeed when without power. Estimating such angles visually is rather difficult. However, there is an instrument that gives essentially the same information: the rate of climb/descent indicator.
The purpose of this article is to show how to bring the aircraft to the point of intended touchdown completely ready to land on the previously chosen point, using a simple and easy method that corrects for the inevitable overshoot and undershoot errors in flight path that will occur.
First, let’s consider what is sometimes called the ‘sight picture’. For the vertical aspect of flight, if you are descending at a constant rate and constant speed, the aircraft will eventually reach some particular point on the ground. This point will appear at some angle below the horizon in your view. Points nearer than this will gradually appear at a greater angle below the horizon, until they actually pass under and behind the aircraft. Points beyond will gradually appear to move up toward (lesser angle below) the horizon. The point in question will remain at the same angle below the horizon.
Estimating the angle below the horizon is not always easy, but if you are flying at constant airspeed and sink rate, the nose of the aircraft will stay at a constant angle (attitude) with respect to the horizon and therefore the nose can be used as a reference.
So when flying at a particular sink rate and constant air speed, if the point you wish to reach is ‘moving up’ with respect to the nose or the horizon, you are going to land short. And if that point is ‘moving down’, you will touchdown beyond your chosen point. This ‘sight picture’ is how you will know exactly what to do to fly the airplane to get exactly to your chosen landing spot.
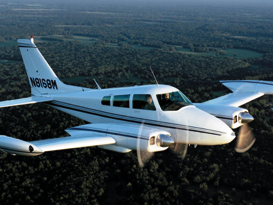
After the engine quits and you realize you will have to make a forced landing, fly the airplane at its best angle of glide condition. Usually the aircraft is already cleaned up for cruise flight so the only other thing you might wish to do is to set the prop to low rpm pitch to reduce its drag if this option is available. ‘Best angle of glide’ speed is usually very close to ‘best rate of climb’ speed. This will give you the largest radius of real estate in which to pick a landing spot.
If your first choice spot moves up in your view, you aren’t going to get there. If it doesn’t go up or down, you might make it—or you might not. Discard it.
You want a spot that you know you can reach, one that is moving down a little in your view. The secret of this method is that you fly best angle of glide until you reach and can stay in a situation where you can recognize and easily correct for your almost inevitable under-shoots and over-shoots.
You want your approach for landing to be a long straight-in one. The longer, the better. It is during the APPROACH mode that you can correct for under-shoot or over-shoot. You should be within less than 30° of final landing heading or you will have difficulty correctly sensing the extra altitude loss that will result if turning more than this.
I suggest, if feasible, that you pick your exact spot so that your touchdown is at 1/3 of the way down the length available. This gives you even more protection from over or under shooting and a better chance of avoiding fences and power lines.
APPROACH mode is flying the airplane at a particular speed and only at AV (average) sink rate or MIN (minimum) sink rate or MAX (maximum) sink rate at any moment. These will all be explained shortly. Nothing else is permitted.
The APPROACH airspeed to be used is your normal approach speed (usually 1.3 times stall speed) plus 10. The 10 is added for two reasons. First, you are a little further away from stall. Second, it is easier at the end to get rid of a little excess airspeed when you have the landing ‘made’, than it is to gain airspeed in the same configuration and sink rate—which is impossible. I will call this APPROACH speed.
Finding MIN and MAX (and AV) sink rates is easy and requires only a little bit of flying. It is best, but not essential, to do this within a couple thousand feet of sea level near standard temperature. Use the APPROACH airspeed as defined above.
First, find your MIN (minimum) sink rate. Clean the aircraft up as much as possible. Engine at idle, prop low rpm pitch, gear up, no flaps, cowl flaps closed, and anything else you can think of. Check your rate of sink. This is your MIN (minimum) sink rate. If in an actual forced landing the prop stops windmilling, your MIN sink rate will be a little less than this of course.
To determine MAX sink rate, ‘dirty’ up the airplane as much as possible. Use all that is available. Engine at idle, prop at high rpm pitch, full flaps, gear down, cowl flaps open, forward slip, and anything else that works. This is your MAX (maximum) sink rate.
Now calculate the AV (average) sink rate you should use that will touch you down halfway between where your touchdown point would be at MIN sink rate and where it would be at MAX sink rate. AV equals (2 times MAX times MIN) divided by (MAX plus MIN). That is,
AV = (2 x MAX x MIN) / (MAX + MIN)
Important: note that AV is not the average of the MIN and MAX. For example, if MIN was 600 feet per minute and MAX was 1200 feet per minute, the AV is 800 feet per minute, not 900.
(For those mathematically inclined, AV is actually the average of the ‘minutes per foot of altitude loss’ for MAX and MIN with that average then converted back to feet per minute. Using AV calculated this way, when gliding in at AV, you can shorten your glide using MAX the same distance you can extend your glide using MIN.)
How do you accomplish AV sink rate? Partially ‘dirty’ up the plane until you get the AV sink rate. If you can accomplish this with the landing gear down, so much the better.
Now go fly at MIN, MAX, and AV sink rates and practice from a few different altitudes until you have a fair idea what the ‘sight picture’ (basically, angle) is for these different sink rates, especially AV, and can reasonably predict where you would ‘touchdown’ if you continued these sink rates to the ground. Preferably do this practice in less familiar areas where landmarks won’t give you clues.
You will be amazed how easily you will get a rough idea what these ‘sight pictures’ are. You don’t have to be perfect, just reasonable. The more important one is AV because in an actual engine out situation, MIN and MAX are whatever they are and you just want to be sure that you estimated the sight picture for AV well enough that the actual MIN and MAX will easily correct your under-shoots and over-shoots, respectively.
You will begin APPROACH mode when you think that flying APPROACH speed at AV (average) sink rate will bring you exactly to your chosen touchdown point. Most of APPROACH mode will be flown at AV (average) sink rate. You will change to MIN or MAX sink rates only for short periods to correct for when you respectively under-shoot (you will—landing spot moving ‘up’) and when you over-shoot (you will—landing spot moving ‘down’) as judged by the ‘sight picture’, and then back to AV sink rate until you see the need to go to MIN or MAX sink rate for another correction.
For instance, at APPROACH speed of 90 mph, if AV is 800 feet per min. and MIN is merely 100 less or 700 fpm, going to MIN for only 10 seconds will stretch the glide by 188 feet. For every 1,000 foot of altitude loss, sinking at 700 fpm vs. 800 fpm will extend the glide by about 1,400 feet. Since the difference between MIN and AV, or MAX and AV is likely to be much greater than only 100 fpm, you can easily see that using this method, it would actually be difficult to ultimately miss your chosen landing spot. Commonly you will make only perhaps two adjustments of your glide path and the final one or two miles will be boring just waiting to get to the spot you chose.
If touchdown is at altitude or it’s a hot day, increase the AV sink rate you calculated by the percent increase of your true airspeed over your indicated airspeed. For example, if your true airspeed is 15% greater than your indicated airspeed because of altitude and/or heat, increase your AV sink rate by 15%.
This is a technique you can teach a non-pilot in a few minutes. You would still have to wake up to make the actual landing however!
I taught this to our twelve year old son who quickly learned the approximate ‘sight pictures’ for MAX, MIN, and AV. Then I took him out in the desert with few landmarks that could help with estimating altitude or much else. I picked an identifiable spot and told him to tell me whether to fly MAX, MIN, or AV which I then did. We did this three times and in each case he made two corrections, one for over-shoot and one for under-shoot, not in the same order in each case, and we just sat there for the last couple of miles. If we had continued to the ground we would have probably made contact within a hundred feet or so of the chosen spots.
And don’t forget to extend the gear before landing if that is an issue!
Safe and Easy Forced Landings
Dr. Sherwood Kaip
El Paso, TX
<skaip799@gmail.com>; cell: 1 (915) 309-6340
This material may be reproduced if author attribution is given.
To return from PRINT page, click "back" arrow on your browser